Mentor’s Display Control gives designers and librarians myriad options for influencing how a design is displayed on the screen....
READ MORE
20.01.2015
Mentor Expedition Library Tutorial: Making PCB Library Components from Existing Parts


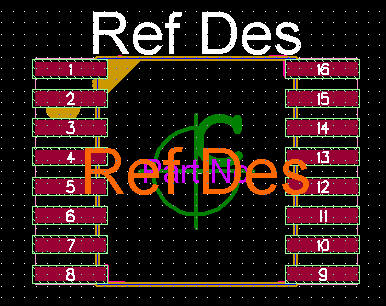
For increased consistency within a PCB library, it is often best to create new library parts from previously existing components with similar properties. This minimizes the amount of time spent creating any particular footprint, and allows the librarian to maintain consistency in part labeling and format. For the purposes of this tutorial, we’ll be modifying a 24 pin QFN (datasheet here) into a 16 pin SOIC (datasheet here).
Before we begin, here are a few things to keep in mind.
- The component to be modified should have a larger pin count and body size than the new component. Removing pins is simpler than adding them.
- Parts with identical Padstacks are preferred, but not required. This simply removes a number of steps from the conversion process, speeding up your part production.
Base Component
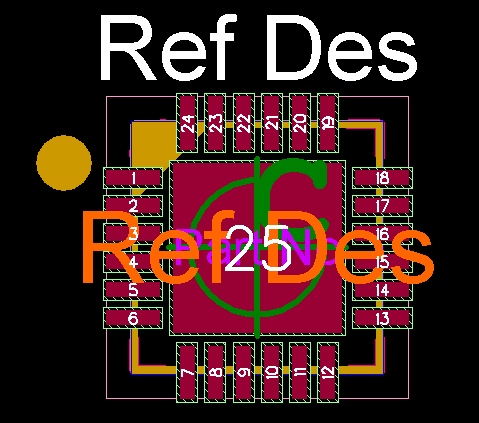
- Open Library Manager’s cell editor, and navigate to the part to be modified.
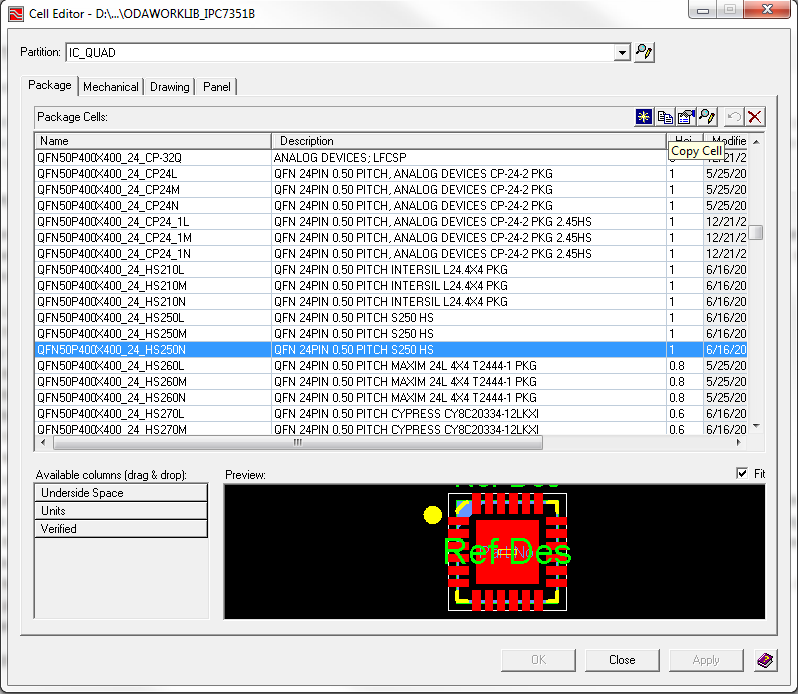
- Select the relevant component, and click the Copy Cell button. A duplicate cell with _1 appended will appear.

- Modify the part Name, Description, and Height to the correct information, per the datasheet of the new component to be made.
- Press the Edit Graphics button to open the new cell, preserving the original in the library for use in later designs.

- Open the Place Pins dialog box.

- From the box at left, select any excess pins (in this instance pins 24-17), and click the Delete Pins button.
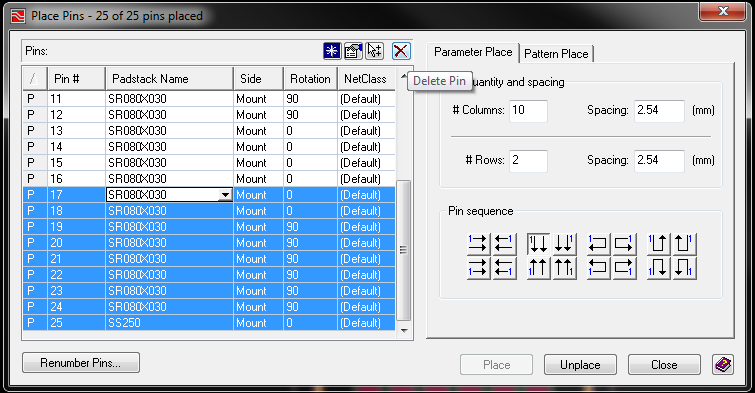
- Select all remaining pins, and click the Unplace button in the bottom right of the Place Pins dialog box.

- Select the remaining pins again, and choose the correct Padstack for the cell in the Padstack Name column.
- Note: You must hold the Shift key when selecting the Padstack to apply the change to all selected pins simultaneously.
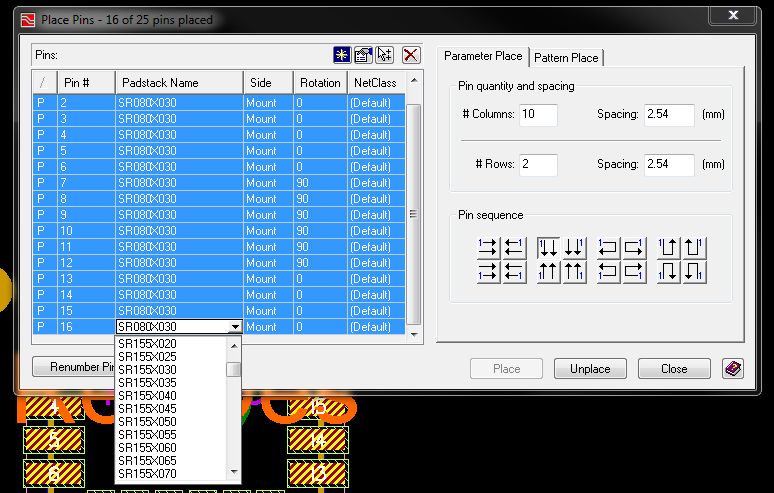
- Note: You must hold the Shift key when selecting the Padstack to apply the change to all selected pins simultaneously.
- To re-place the pins, we’ll be utilizing the Parameter Place option. For a more thorough look into this tool, see our Tutorial here. Enter the relevant data (see image) and click ok. The Place Pins dialog will close, and an outline of all pins in their correct pattern will be following your mouse.
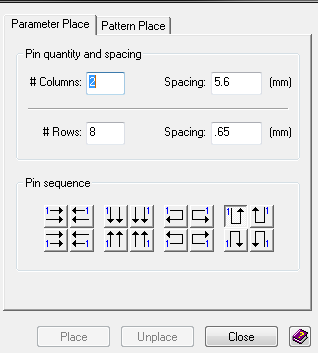
- Press the X-Y Place button at the bottom of the Cell Editor screen (hotkey: F3). Enter the X-Y coordinate where Pin 1 of the component should be, and click Ok.
- Note: Optimum’s standard for component origins calls for the origin at the center of component body for surface mount parts. Consequently, the pin one location will be ½ of the total length and width of the pins.
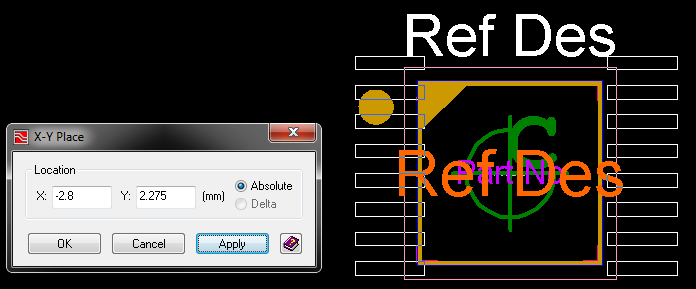
- Note: Optimum’s standard for component origins calls for the origin at the center of component body for surface mount parts. Consequently, the pin one location will be ½ of the total length and width of the pins.
- With pins placed, modify the Placement, Assembly, and Silkscreen outlines to meet the datasheet specifications.
Final Product
